The Strategic Advantage of Factory Manufacturing
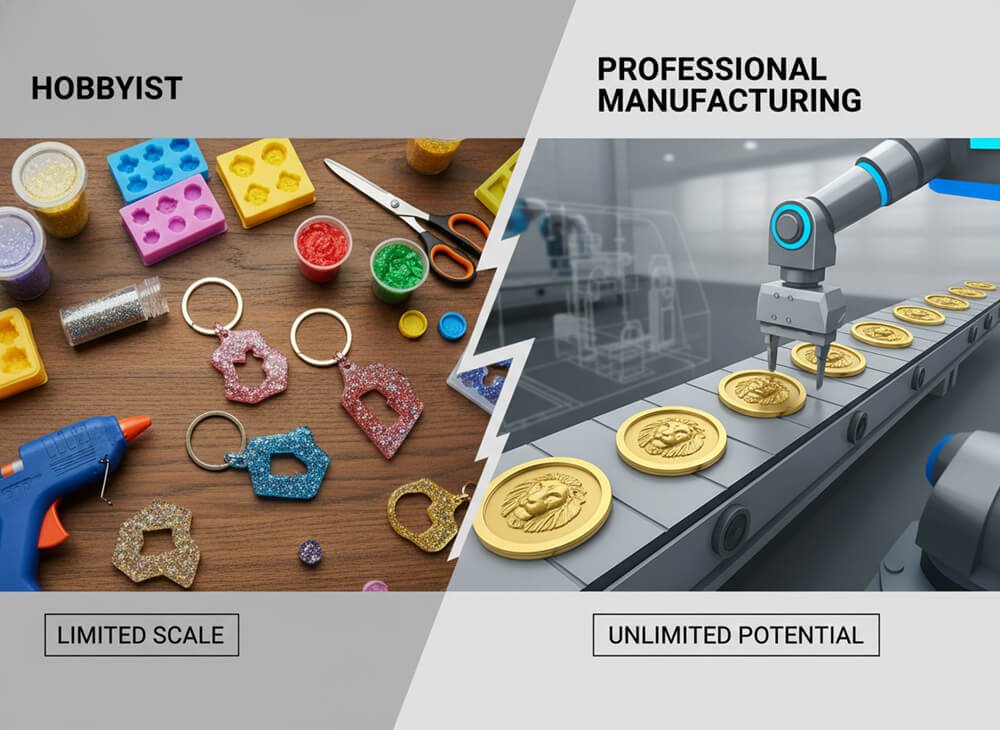
Why should you choose a factory over a DIY approach? The answer lies in the specific benefits that industrial production offers, which are simply unattainable at home. If you are serious about selling your designs or representing a brand, understanding these advantages is the first step.
1. Scalability: Meeting High Demand
If your design goes viral or your corporate event has 500 attendees, hand-making keychains is physically impossible without sacrificing quality. Factories utilize mass production techniques like micro-drip injection for PVC or hydraulic stamping for metal. This allows them to produce thousands of units in the same time it might take you to hand-craft a dozen. For creators and businesses, this scalability ensures you never run out of stock during a crucial launch.
2. Stability: Unmatched Durability
Factory-made keychains are built to last. Metal keychains produced via die-casting can withstand being dropped, sat on, and jingled against other keys for years without breaking. PVC rubber keychains are waterproof and resistant to dirt, pulling, and tugging. In contrast, DIY materials often degrade; paper inserts fade, and homemade resin can yellow over time. When your brand name is on the product, durability equals reputation.
3. Style: Advanced Customization
Factories offer customization options that are technically impossible at home. Do you want a keychain that spins? A factory can assemble the moving parts. Do you want a gradient color that fades perfectly from blue to pink? UV printing machines can achieve this on acrylic with photographic precision. From glitter epoxy coatings to glow-in-the-dark enamel fills, factories provide a toolkit of special effects that elevate your design from “craft” to “retail product.”
4. Savings: The Economy of Scale
While the upfront cost of a mold might seem high, the per-unit cost of factory keychains drops significantly as you order more. This is the principle of wholesale manufacturing. Buying in bulk allows you to achieve profit margins that make a keychain business viable. For example, ordering 500 acrylic keychains might bring the cost down to a few dollars per unit, allowing you to sell them for significantly more.
Step 1: Designing and Preparing Technical Files
Designing for a factory is different than designing for a sketchbook. You are creating a blueprint that a machine must interpret. Sending a “bad” file is the number one reason for production delays and quality issues. To ensure your keychain looks crisp and professional, you must master the technical preparation of your artwork.
Technical Guide: How to Prepare Your Files for the Factory
Most factories require vector files (AI, SVG, EPS) or high-resolution rasters (PNG at 300+ DPI). Here is a granular guide on how to set up your file to ensure zero errors.
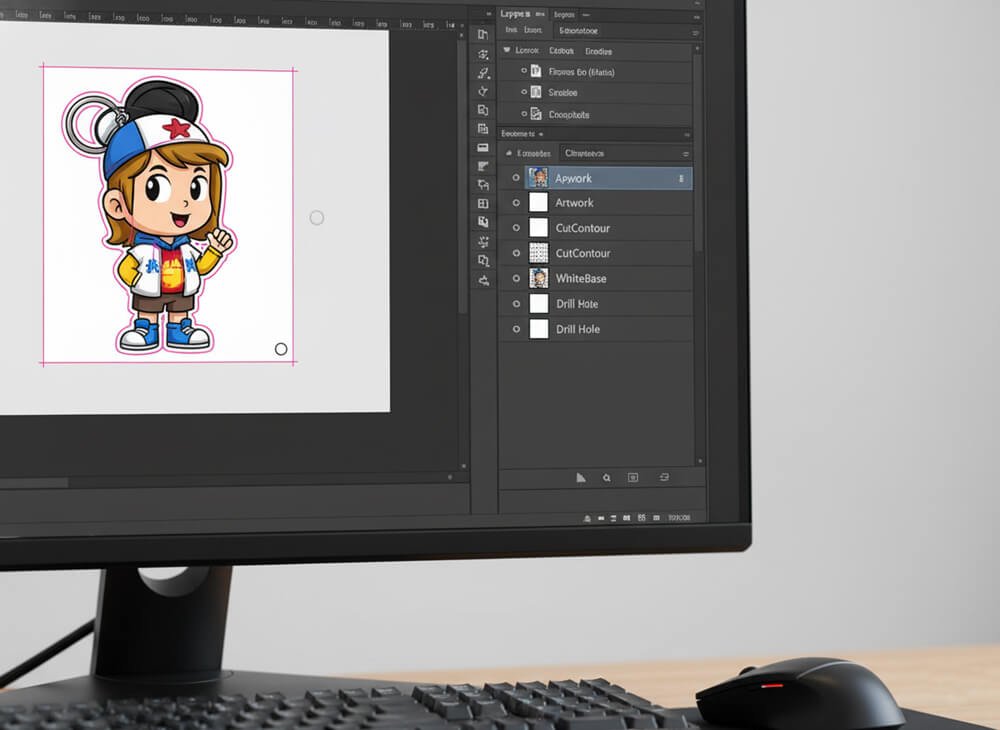
1. The “Bleed” and “Safe Area” (Crucial for Acrylic)
In manufacturing, the laser or die-cutter has a slight margin of error (usually 0.5mm). If your artwork stops exactly at the cut line, a slight shift during cutting will result in an ugly white sliver on the edge of your keychain.
- The Bleed: Your background color or artwork should extend past the cut line by at least 1.5mm to 2mm. This ensures that even if the cut is slightly off-center, the design still covers the entire edge.
- The Safe Area: Keep important details (like text, eyes, or logos) at least 2mm away from the cut line and the hole for the jump ring. You do not want the drill hole to punch through your character’s face!
2. Vectorizing for Enamel (Metal Keychains)
Designing for enamel is like designing a stained glass window. You cannot use gradients or shading; every color must be a solid block separated by a metal wall.
- Minimum Line Thickness: The metal lines that separate your colors must be at least 0.2mm thick. Anything thinner might break during the molding process or fail to contain the liquid enamel.
- Minimum Color Area: The smallest area of color must be at least 0.3mm x 0.3mm. If an area is too small, the syringe needle used to inject the enamel cannot fit, and that area will have to be left as bare metal.
- Simplification: If your logo has complex shading, you must “posterize” it. Convert gradients into solid blocks of color. Most factories limit designs to 4-8 colors; additional colors will incur extra fees.
3. The Hole Placement Strategy
Where you place the hole for the jump ring changes how the keychain hangs and functions.
- Top Center: The standard placement. Best for symmetrical logos or circular designs.
- Center of Gravity (Corner Offset): Best for asymmetrical characters or irregular shapes. If you put the hole on the top-left of a character that is leaning right, the keychain will hang crookedly. You must estimate the center of gravity so the character hangs upright.
- Double Board / Double Hole: For very large keychains (4 inches+), consider using two holes and a chain bridge. This prevents the large item from swinging wildly and hitting things.
4. Color Codes: Speaking the Factory Language
Computer monitors display color in RGB (Light), but physical products use Ink (CMYK) or Enamel (Pantone). To ensure color accuracy, you must specify Pantone Matching System (PMS) codes. This is the universal language of color. If you ask for “Navy Blue,” the factory might guess. If you ask for “Pantone 289 C,” you will get that exact shade every time.
Defining Purpose and Audience
Before selecting a material, consider the end-user.
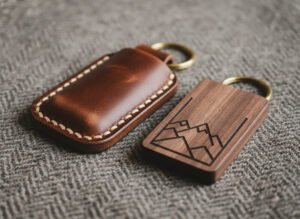
- Corporate & Luxury: If the keychain is a gift for executives or a high-end car dealership, metal is the preferred material due to its weight and premium feel.
- Pop Culture & Art: For anime characters, intricate illustrations, or gradients, acrylic is the standard because it allows for full-color photographic printing.
- Active Lifestyle & Kids: For brands targeting outdoor enthusiasts or children, PVC rubber is ideal because it is waterproof, flexible, and soft, meaning it won’t scratch other items or break if dropped.
Step 2: Selecting the Right Material (The Deep Dive)
The material you choose dictates the manufacturing process, the cost, and the final look of the product. Let’s analyze the pros and cons of the major material categories based on industry standards.
1. Metal Keychains: The Premium Standard
Metal keychains are synonymous with quality. They are durable, heavy, and offer a jewelry-like finish. They are processed through die-casting or stamping.
- Hard Enamel: This is the highest quality option. The enamel is filled into the recessed metal areas and then polished flat until it is level with the metal borders. The result is a smooth, glass-like surface. It is durable and scratch-resistant.
- Soft Enamel: Despite the name, the enamel is hard, but it sits lower than the metal borders. This creates a textured, dimensional feel. It is the most popular option for trading pins and keychains due to its affordability and classic look.
- Die-Struck (No Color): These keychains rely solely on the metal finish. The design is raised and recessed metal, often plated in gold, silver, or antique brass. They offer a classic, sophisticated look suitable for law firms or luxury brands.
- Plating Options: You can choose from shiny gold, silver, black nickel, antique copper, or even rainbow anodized metal. You can even combine two metal colors for a multi-tonal base.
2. Acrylic Keychains: The Artist’s Canvas
Acrylic keychains have exploded in popularity, particularly in the artist and anime communities. They are made from a rigid, clear plastic material.
- Full-Color Printing: Unlike metal which requires metal lines to separate solid colors, acrylic uses UV printing. This allows for gradients, shadows, and unlimited colors.
- Transparency effects: You can leave parts of the keychain clear, allowing for interesting visual effects where the background is visible through the charm.
- Double-Sided: You can print the same image on the back, or a different one (e.g., the back of a character’s head).
- Holographic Finishes: A special film can be applied to make the keychain shimmer with a “broken glass” or “star” pattern.
3. PVC Rubber Keychains: Durable and Playful
Polyvinyl Chloride (PVC) is a soft, rubbery plastic.
- 2D vs. 3D: 2D PVC keychains have flat layers of color. 3D PVC keychains have rounded, sculpted surfaces, giving them a toy-like appearance.
- Indestructible: They are waterproof, mud-proof, and flexible. They are excellent for sports teams and outdoor brands.
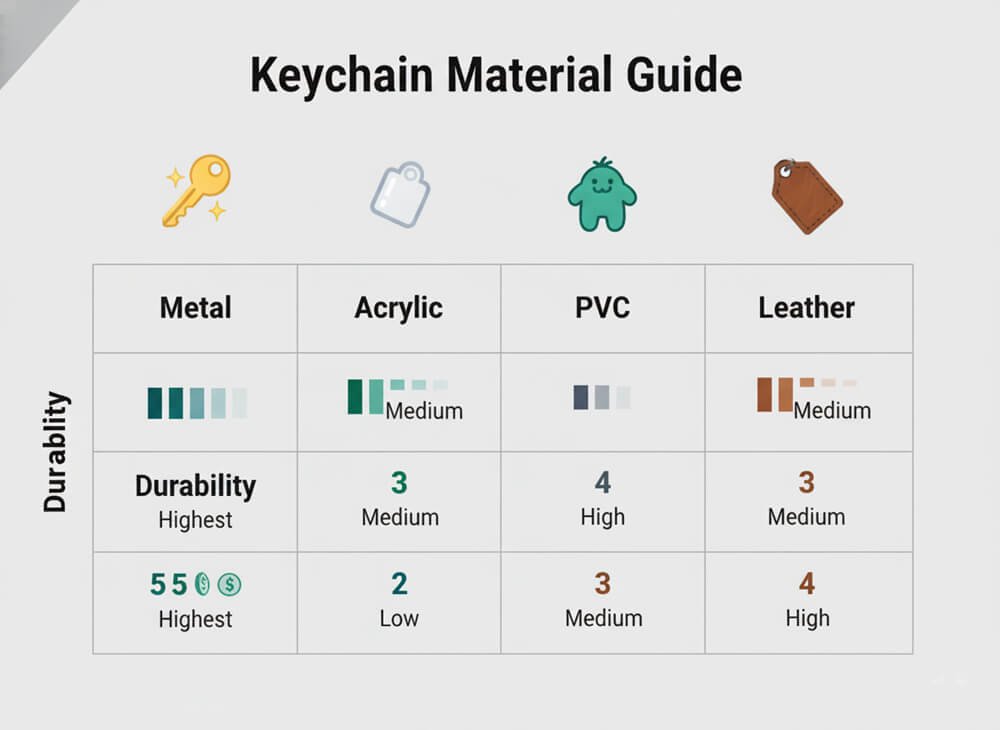
Material Comparison Table
| Feature | Metal (Enamel) | Acrylic | PVC Rubber | Leather |
|---|---|---|---|---|
| Durability | High (Scratch resistant) | Medium (Can scratch) | Very High (Waterproof) | High (Ages well) |
| Design Detail | Solid colors, metal lines | Photo-realistic, gradients | Bold, solid blocks | Embossed/Debossed |
| Weight | Heavy / Premium | Lightweight | Medium / Flexible | Lightweight |
| Setup Cost | High (Mold fee) | Low (No mold) | High (Mold fee) | Medium (Die fee) |
| Best Use | Corporate, Collectible | Anime, Art, Photos | Kids, Outdoor, Mascots | Luxury, Gentleman’s Gifts |
Step 3: Inside the Factory – The Manufacturing Processes
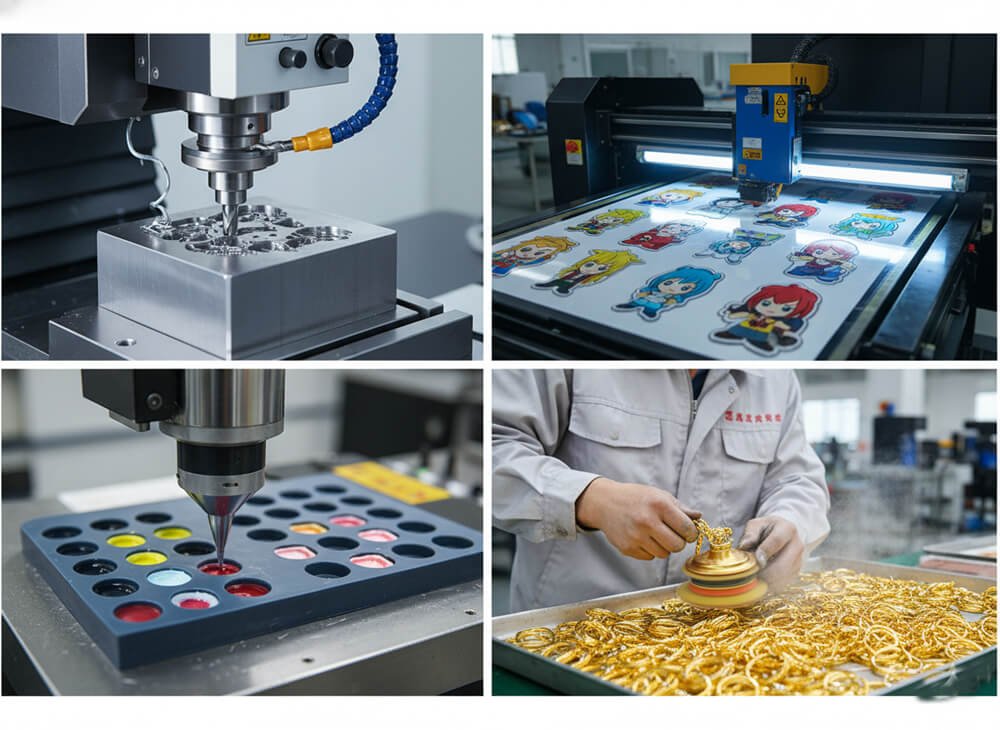
Understanding “how the sausage is made” gives you a significant advantage when communicating with suppliers. It helps you understand lead times, costs, and potential defects.
The Metal Process: Die-Casting and Stamping
1. Mold Making: The process begins with a mold. Computer Numerical Control (CNC) machines carve your design into steel blocks to create a negative image. This is why there is a “mold fee” for your first order.
2. Die-Casting or Stamping:
- Die-Casting: Molten zinc alloy is injected into the mold under high pressure. This is best for complex shapes with cutouts or 3D relief.
- Stamping: A hydraulic press slams a design into a sheet of metal (brass or iron). This creates a sharp, clean impression.
3. Plating: The raw metal pieces are racked and dipped into electroplating tanks. An electrical current bonds a thin layer of gold, silver, or nickel to the surface.
4. Coloring: Workers (or machines) use syringes to fill the recessed areas with liquid enamel.
5. Baking and Polishing: The keychains are baked to harden the enamel, then buffed to remove imperfections.
The Acrylic Process: UV Printing and Laser Cutting
1. Preparation: Large sheets of high-quality, optical-grade acrylic (PMMA) are prepared.
2. Printing: The sheets are placed on a flatbed UV printer. The printer lays down the CMYK ink. Crucially, a layer of white ink is printed underneath the colored ink. Without this white base, the colors would look translucent and washed out against the clear plastic.
3. Cutting: A laser cutter reads the vector cut lines from your file. It traces the shape, melting through the acrylic with extreme precision. This leaves a smooth, polished edge rather than a rough saw mark.
4. Coating: To protect the print from scratching, you can request an “epoxy dome” (a clear resin layer) or use a “double-board” method where the print is sandwiched between two sheets of acrylic.
The PVC Process: Dispensing and Baking
1. Mold Creation: Similar to metal, a mold is carved from aluminum or copper.
2. Mixing: Liquid PVC is mixed with pigments to match your Pantone colors. The mixture is placed in a vacuum chamber to remove air bubbles, ensuring a smooth finish.
3. Dispensing:
- Manual Dispensing: For small batches or high detail, workers hand-fill the mold colors using syringes.
- Micro-Drip (Mechanical): For mass production, automated machines dispense the liquid with robotic precision.
4. Baking: The mold is heated to solidify the liquid into flexible rubber.
Step 4: Finding and Vetting a Manufacturing Partner
Finding a factory is easy; finding a good factory is the challenge. You are looking for a partner who offers transparency, quality, and reliability. One of the most significant decisions you will make is whether to buy from a local trading company or go directly to the source.
The Case for Direct Sourcing: China Factories vs. Local Trading Companies
When searching for a manufacturing partner, you will often face a choice: buy from a local trading company in your country or go directly to the source in manufacturing hubs like China. Based on industry data, going direct offers distinct advantages.
1. Access to “Factory-Direct” Pricing
The most immediate benefit is cost. Trading companies act as middlemen; they buy from the factory, add a markup for their service, and then sell to you. By communicating directly with manufacturers in hubs like Kunshan or Shenzhen (regions famous for metal and electronic manufacturing), you access “factory prices.” This eliminates the middleman’s fee, significantly lowering your per-unit cost, especially for bulk orders where profit margins are critical.
2. Advanced Production Capabilities
Local print shops or trading companies often have limited equipment, typically focusing on simple printing. In contrast, established factories in China often have decades of experience and specialized machinery for complex processes.
- Die-Casting & Stamping: Industrial-grade hydraulic presses for metal keychains are standard in these factories.
- Micro-Drip Dispensers: For PVC items, direct factories use automated mechanical dispensers to ensure precision that manual local methods cannot match.
- Integrated Supply Chains: These factories handle the entire process—from mold making and raw material processing to polishing and packaging—under one roof, ensuring a seamless production flow.
3. Direct Quality Control and Oversight
When you work with a trading company, you are playing a game of “telephone” regarding quality. If you spot an error, the trader must relay it to the factory, increasing the chance of miscommunication. Working directly with the “original factory” allows for faster feedback loops. Many manufacturers in these hubs have workers remain on-site to oversee production steps personally, conducting manual quality checks on enamel fills and attachments before the goods ever leave the facility.
4. Experience with Global Markets
A common misconception is that direct factories lack service skills. However, many manufacturers in these regions have been running for over 20 years and have proven experience specifically in U.S. and European markets. They understand Western quality standards, safety regulations, and design preferences, offering the best of both worlds: Asian manufacturing efficiency with Western service standards.
Vetting Criteria: How to Spot a Good Partner
Regardless of where your partner is located, use these criteria to vet them:
- Transparency: Pricing should be clear. Look for hidden fees like “setup fees” or “mold fees.” A good partner will break these down for you.
- Portfolio: Do not just look at digital mockups. Ask to see photos of real products they have made. Look for clean enamel fills, smooth acrylic edges, and bright colors.
- Communication: Send an inquiry. Do they reply within 24-48 hours? Do they ask clarifying questions about your artwork? A partner who asks questions is better than one who blindly prints a bad file.
- MOQ (Minimum Order Quantity): Some factories require 50 or 100 units. Others allow as few as 10. Choose one that fits your budget and risk tolerance.
Step 5: The Ordering Workflow and Quality Control
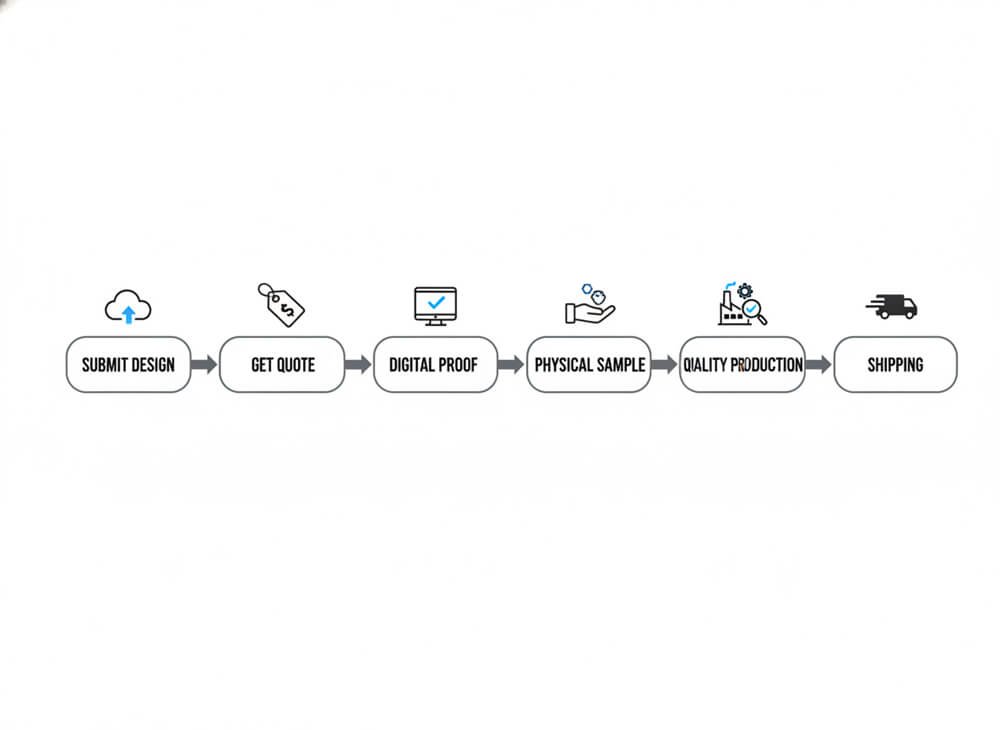
Once you have chosen a partner, the process typically follows this workflow:
- Submit Design & Quote: Send your vector files and specify details (size, material, quantity, plating color). Confirm the price, including shipping and taxes (DDP – Delivered Duty Paid is preferred).
- Digital Proofing: The factory will send back a “proof”—a digital mockup of what the keychain will look like. Check this obsessively. Look for spelling errors, missing cut lines, or incorrect colors. This is your last chance to change things for free.
- Sample Production: For orders over 50 units, always request a physical sample (or at least a photo of the first unit). This confirms that the colors are correct in real life.
- Mass Production: Once the sample is approved, the factory creates the full order. This can take 2-4 weeks depending on the material.
- Assembly & Packaging: The factory attaches the keyrings, chains, and lobster clasps. They pack items into individual poly bags (OPP bags) to prevent scratching.
- Shipping: Goods are shipped via air freight (fast) or sea freight (slow but cheap for huge orders).
Troubleshooting Quality Issues:
The “Foggy” Acrylic: If your acrylic keychains arrive looking dull and scratched, don’t panic! 99% of the time, this is just the protective film. Acrylic sheets come with a thin plastic layer to protect them during cutting. You must peel this off to reveal the shiny surface underneath.
Underfilled Enamel: If the color in your metal keychain looks “dipped” or concave, the factory may have underfilled the mold. For future orders, specify that you want a “level fill.”
Wrong Colors: If the physical product doesn’t match your screen, it’s usually because you didn’t specify Pantone codes. Always use PMS codes for critical branding.
Decoration and Customization Techniques
Once you have the basics down, you can elevate your product with special decoration techniques that add value and uniqueness.
Engraving vs. Embossing vs. Debossing
Engraving uses lasers or diamond tips to cut your design into the surface. It is sleek and permanent, perfect for metal and wood. Embossing raises the design up from the surface, creating a 3D relief you can feel. Debossing presses the design down into the material, which is common in silicone and leather applications.
Special Print Effects
For acrylic, consider adding a holographic film. This gives the keychain a shimmering, multi-colored finish that changes as it moves in the light. For an extra layer of protection and a 3D look, you can request an Epoxy Dome—a clear resin coating that covers the printed surface.
Glow and Glitter
Want your brand to be seen in the dark? Manufacturers can add phosphorescent powder to PVC or enamel to create glow-in-the-dark effects. Similarly, glitter can be mixed into enamel or acrylic for a sparkling finish that catches the eye. These small additions can justify a higher retail price.
Business Strategy: Pricing and Marketing
Now that you have 500 keychains, how do you turn them into profit? Keychains are high-margin items. A metal keychain that costs you $2.00 to make can easily sell for $10.00 – $15.00.
Pricing Strategy
Calculate your Landed Cost: (Manufacturing Cost + Mold Fee + Shipping + Taxes) / Number of Units.
Example: If you paid $300 total for 100 keychains, your landed cost is $3.00.
To make a healthy profit and cover platform fees, you should sell at 3x to 4x your landed cost. Pricing them at $12.00 allows you to run sales and cover marketing costs while still profiting.
Marketing Tactics
- The “Freebie” Leader: Use keychains as a “Free Gift with Purchase” for orders over $50. This increases your Average Order Value (AOV).
- The Mystery Bag: If you have multiple designs, bundle them into a “Mystery Keychain” product. This gamifies the shopping experience and helps move inventory of less popular designs.
- Pre-Orders: Launch a pre-order campaign using the digital proof from the factory. This allows you to fund the manufacturing costs using customer sales, reducing your financial risk to zero.
Conclusion: Unlocking Your Potential
Creating a custom keychain is a journey that transforms a simple digital idea into a tangible object that people carry with them every single day. It bridges the gap between digital art and physical utility. By choosing factory manufacturing, you unlock a world of professional quality, durability, and scalability that DIY methods simply cannot match.
Whether you choose the weight and prestige of die-cast metal, the vibrant creativity of acrylic, or the rugged durability of PVC, the key is to plan your design carefully, understand the materials, and partner with a manufacturer who understands your vision. The process requires patience—proofing, sampling, and shipping take time—but the reward is a product that can build your brand, delight your fans, and generate revenue for years to come.
Frequently Asked Questions
The cost varies significantly based on material, size, and quantity. Metal and PVC keychains usually have a one-time “mold fee” ranging from $50 to $100, plus a per-unit price ($1-$4). Acrylic keychains typically have no mold fee and cost less per unit. Buying in bulk (100+ units) significantly lowers the cost per item.
It depends on your goal. Metal is best for durability and a premium, corporate feel. Acrylic is best for complex, colorful artwork like anime characters or photos. PVC Rubber is best for waterproof, durable items for kids or outdoor use. Leather is best for sophisticated, high-end gifts.
Generally, no. Legitimate factories will not produce designs that infringe on copyright laws (like Disney characters or famous logos) unless you own the rights or have written permission. It is always best to create original artwork to avoid legal issues and confiscation by customs.
Production times vary by complexity. Typically, sample production takes 5-10 days. Once the sample is approved, mass production takes another 10-20 days. Shipping can add another 1-4 weeks depending on the method (Air vs. Sea). Plan for a total turnaround time of 4-6 weeks.
To prevent the print from scratching off, choose a factory that offers “double-board” acrylic (where the image is sandwiched between two layers) or request an epoxy coating (dome) on top of the print. Ensure the factory uses UV printing for fade resistance.
In printing, “bleed” refers to the artwork extending beyond the cut line. This ensures that when the machine cuts the shape, there are no white edges if the cut is slightly off-center. Most factories require a bleed of 1-2mm for acrylic keychains.